Intro to Night Photography
Overview
The long exposures of night photography allow for surprises and interesting results, but low light and long exposures can be a bit tricky. This guide will help you get started with night photography plus include a few tips and tricks I’ve picked up while shooting at night.
The camera captures time in a way our eyes can not, this makes night photography fascinating to me and one of my favorite ways to photograph. Also, night is the only free time we can find and just because its dark doesn’t mean you can’t do photography. Hopefully this guide helps encourage you to get out there and shoot.
Important
In my mind, the two most important things for night photography is: (1) warm clothes and (2) food and drink. If you are hungry or cold you aren’t going to be motivated to stand out there and shoot 20 minute exposures. So dress for the weather and don’t go out hungry or bring a snack.
A good tip, I wear fingerless gloves which allows me to still make camera adjustments, but keep my hands from freezing.
Bring a friend. Another great motivator to get you up and out for night photography is going with a fellow photographer. Having some one else there gives you a sense of security in the dead of night. You want to feel comfortable and safe especially if you are in shady neighborhoods where all the great shots hide.
Be wise about where you go and shoot, there are also dangers besides crime. For example, don’t try to climb difficult terrain or unknown areas while carrying equipment. It can be very easy to slip and fall, especially in dark unfamiliar areas.
Cameras for Night Photography
Ok, so we aren’t hungry or cold and we feel secure, basic needs met, now we need camera equipment.
You don’t need fancy cameras or equipment, just about any cameras will do, the key factor is not the camera size or type but if it can be set to a bulb or programmable setting. I’ve shot at night with all sorts of cameras from digital SLRs, to cheap toy Holgas, Hasselblads and whatever I could find.
I currently use Fuji X cameras, which I can easily set to Bulb mode by turning the exposure dial to B. Bulb mode is the camera will take an exposure for however long your finger is on the button.
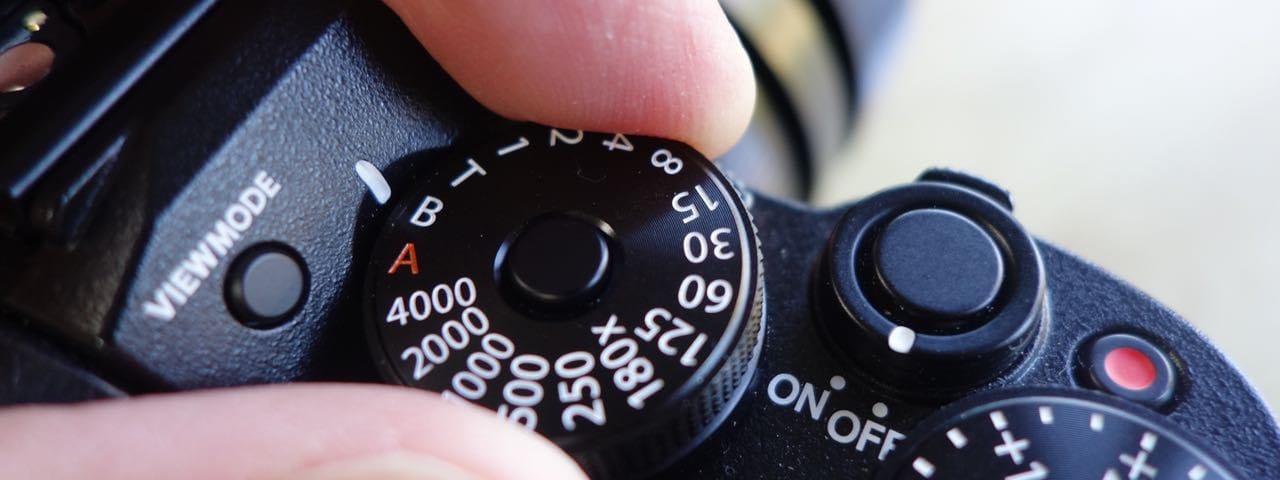
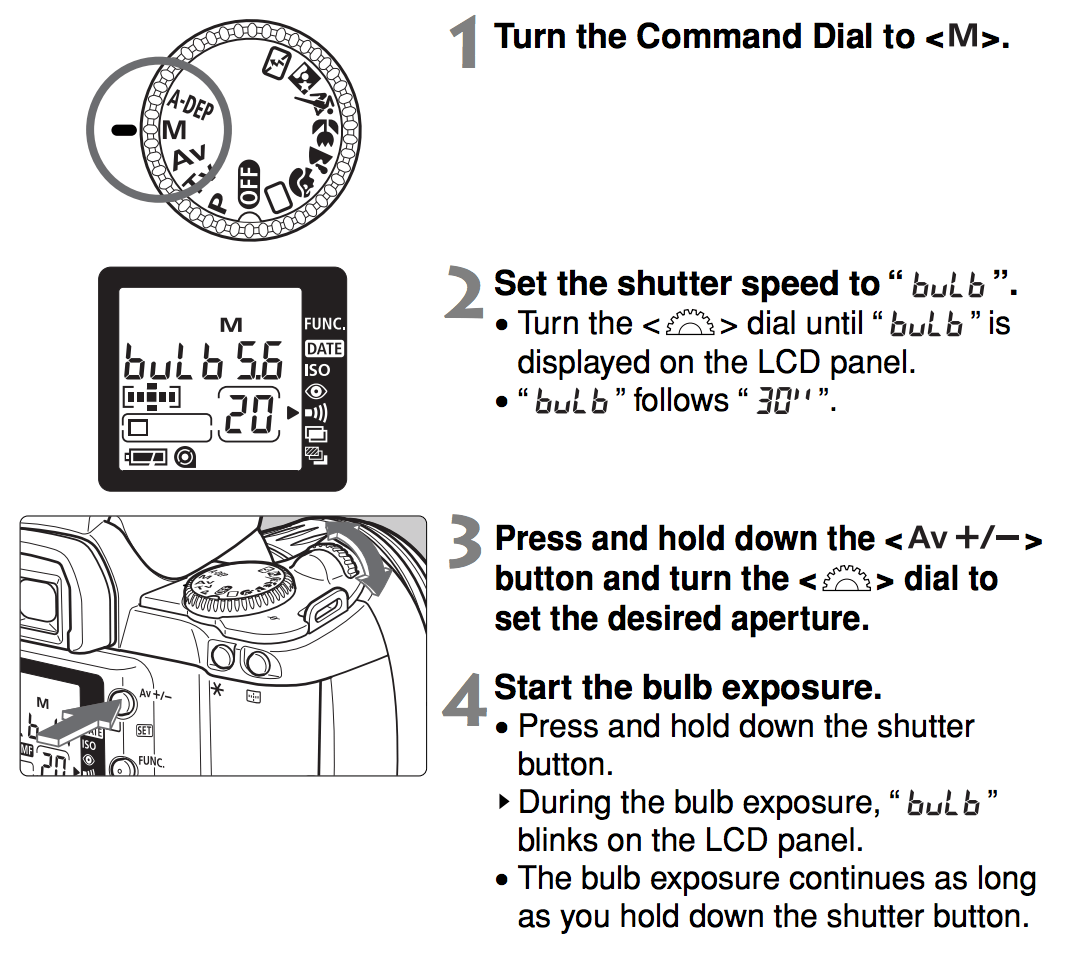
Bulb Mode
To set bulb mode for digital SLRs, you need to switch to manual mode and then change the exposure time past the longest setting, which is often 30s. Here are two sample instructions for Nikon and Canon.
| Nikon Bulb Mode | Canon Bulb Mode |
|---|---|
[ |
|
From Nikon D700 manual |
From Canon Rebel Ti manual |
Find your manual with a Google search for “[camera model] manual”. This will return a PDF of your manual which you can search for “bulb mode”.
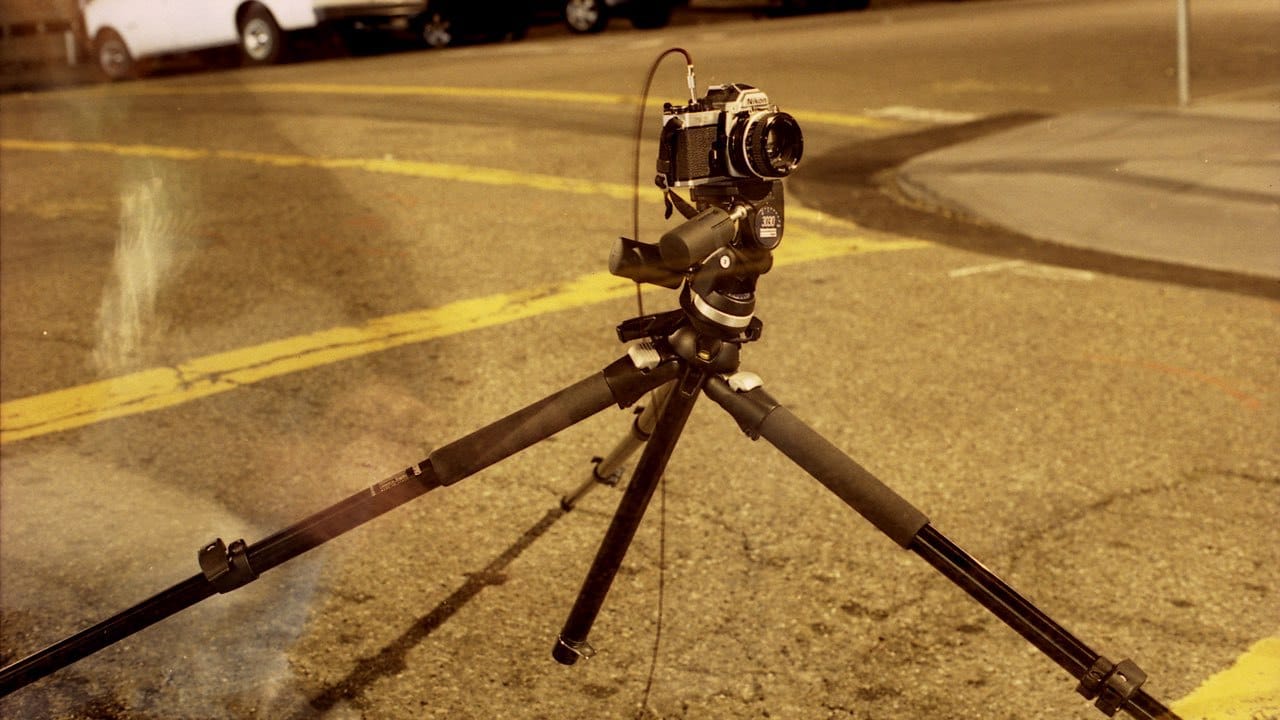
Remote Trigger / Cable Release
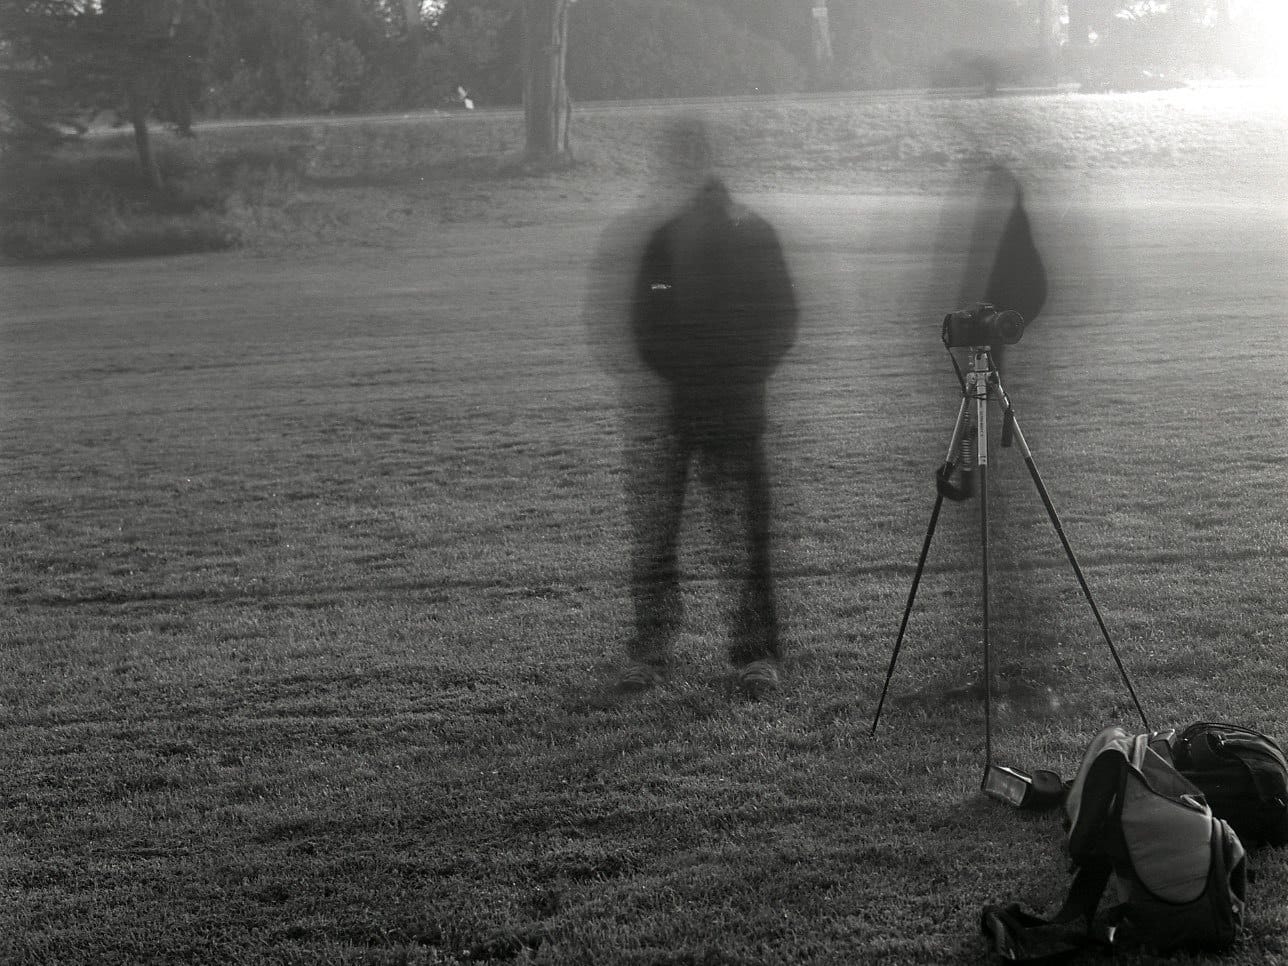
A typical exposure can be several minutes and if you could even stand the boredom of holding the shutter that long, you would definitely shake the camera and cause blurring.
You will want a cable release, remote control or program your camera so you don’t really have to hold your finger there. The X100S uses an old school mechanical plunger which you screw on and can lock open to be your finger holding down the button. My Fuji X-T1 uses a digital remote control.
See your camera’s manual for compatible remotes. Some digital remote controls can be programmed to set the exposure time. I don’t have experience with these, but likely will get one someday. Also, fancier digital cameras can be programmed or even tethered, I went out with one friend who used his laptop to control the camera.
Technique – Handheld or Flashes
You can use flash during night photography but it can give stark and harsh look. Generally flash is best used for concerts and event photography with people up close. Or requires a bit more flash equipment to get the right look, see Dustin Diaz’s setup shots for some awesome flash work at night.
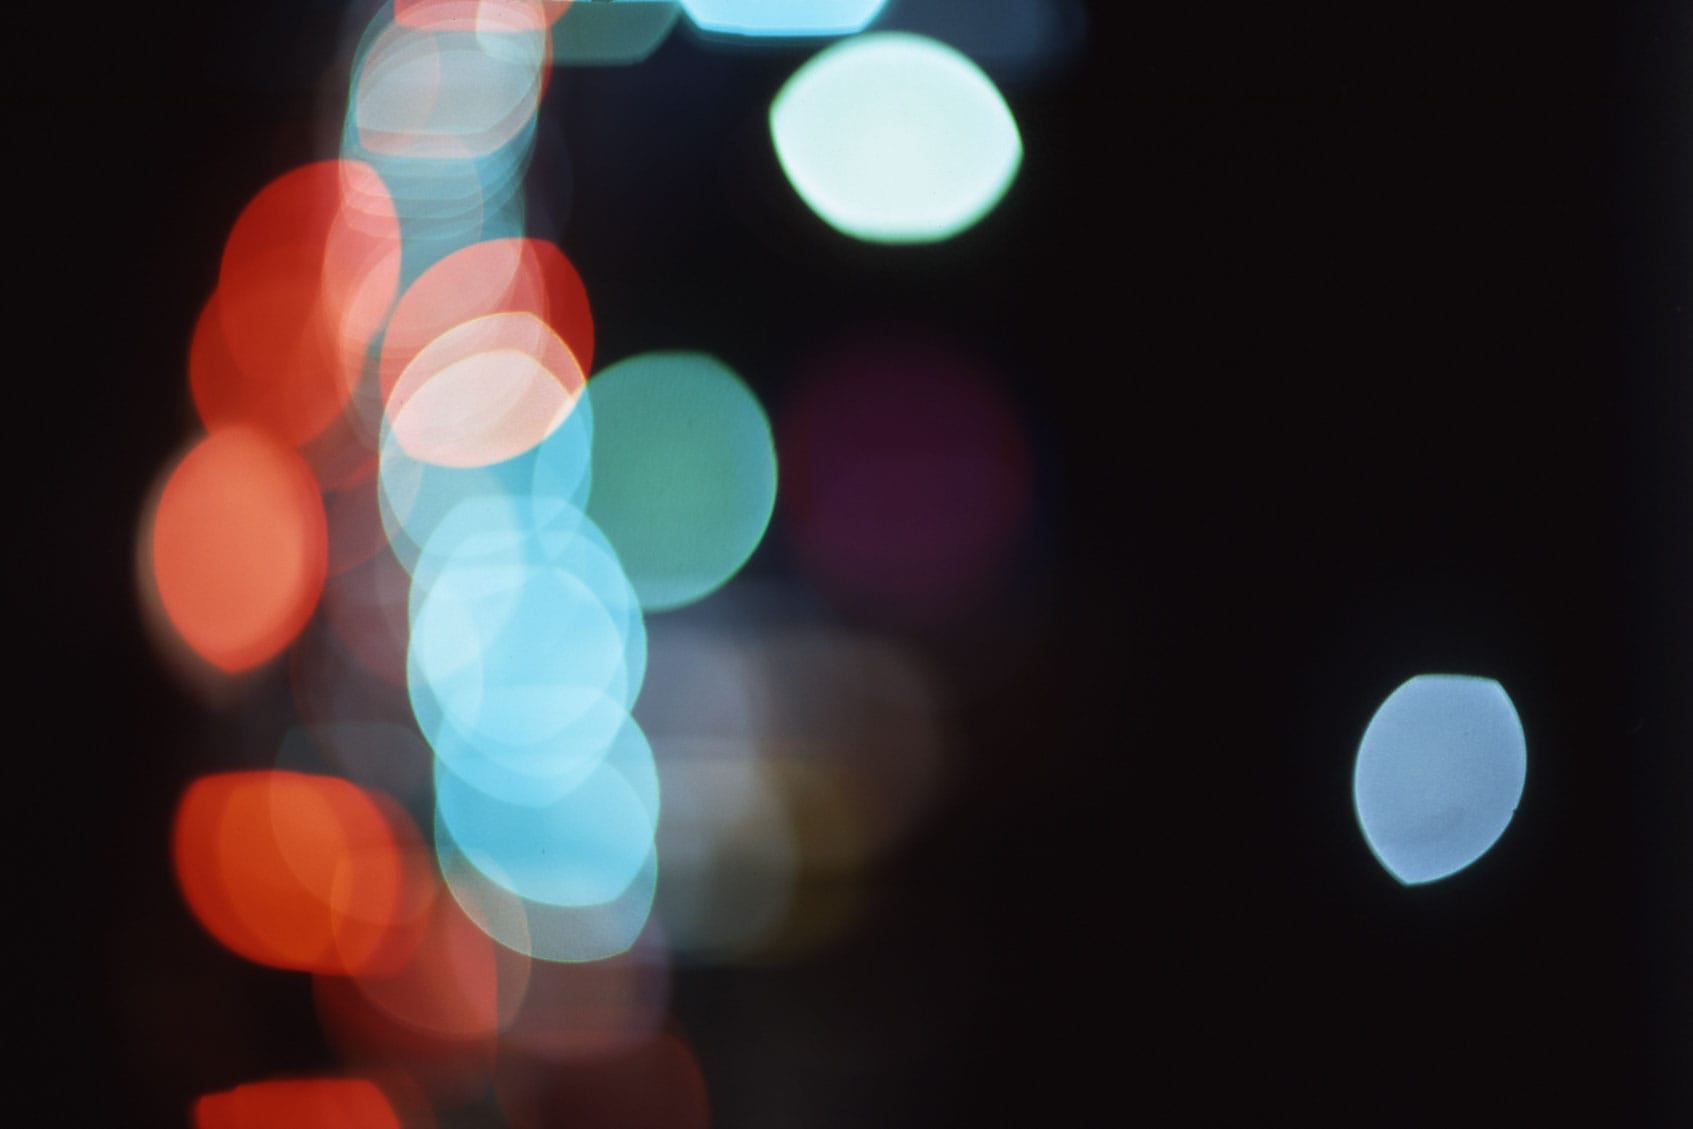
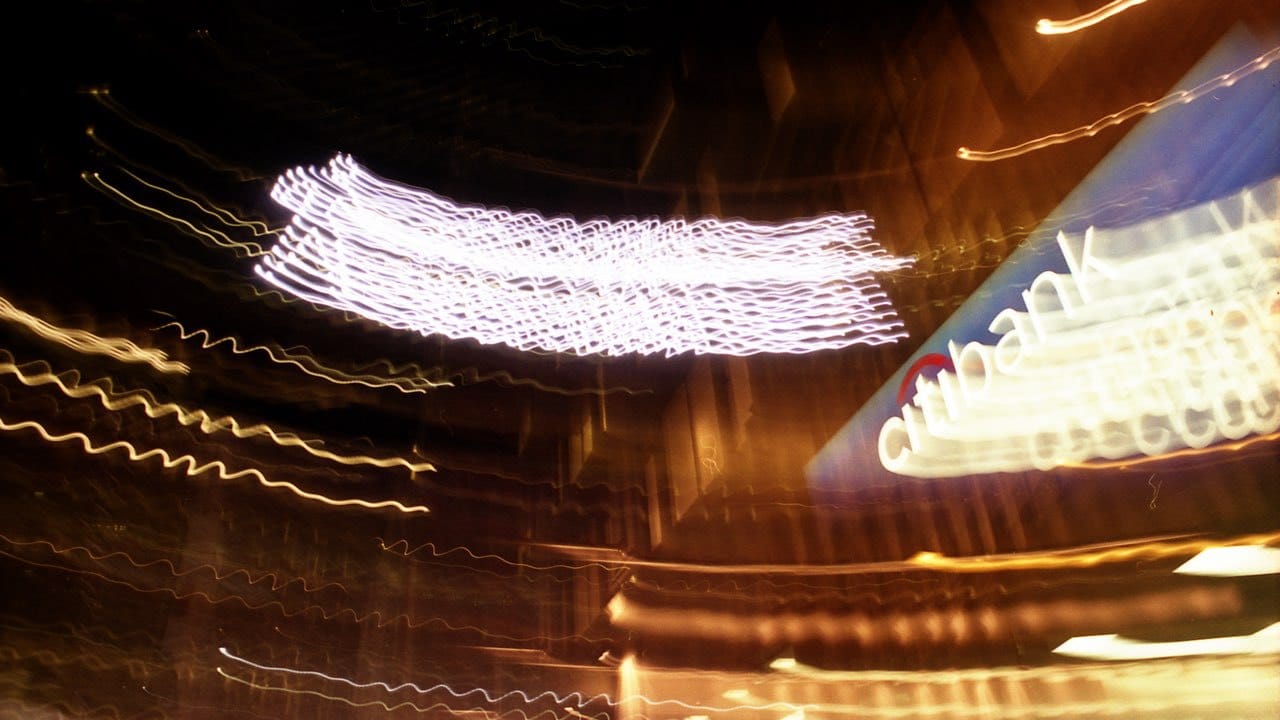
You can also simply do handheld shots, but will limit how long of an exposure you can do and will require relatively bright lights. The following shot was at Times Square handheld for a 4s exposure.
Technique – Exposure
One of the hardest parts of night photography is getting the right exposure. Numerous factors come into play from what the light source is moon, artificial, reflections. A big advantage for digital cameras is being able to see what you captured immediately, which gives you an idea if you’re in the right ballpark.
Remember, your eyes are adjusted to the darkness, so viewing an image on the backlit LCD will seem much brighter then what the image might actually be. Check the histogram to see if you have a good distribution of highs and lows.
The single greatest method to get the right exposure is: practice, practice, practice.
I normally shoot night with an aperture of f/8 and an ISO 200. Most photos I want to be sharp throughout and f/8 gives good sharpness without too long exposure times. A one-stop aperture difference is twice as much exposure time, a 10 minute exposure at f/8 would be 20 minutes at f/11. I keep the ISO level low to reduce noise.
Where to get that base exposure? It all depends on the scene and amount of light. For city shots with a fair amount of light, your in-camera meter might get you reasonably close. Bright city streets might only be 5-10 seconds up to a minute or two, this is short enough you can test out pretty quickly.
If you get beyond the city lights and have only the moonlight as a light source, it will increase greatly. A full moon can provide a good deal of light, but quickly falls off if you are several days before/after the full moon.
I will test out a scene using a wider open aperture to get a shorter exposure time. Remember, one stop is twice the exposure so if my initial guess is f/8 at 20 minutes. I might try a test exposure of 3 minutes at f/2.8 and adjust from there. A test exposure will also show ways the light is working, any light leaking into the scene or too bright.
Technique – Focus
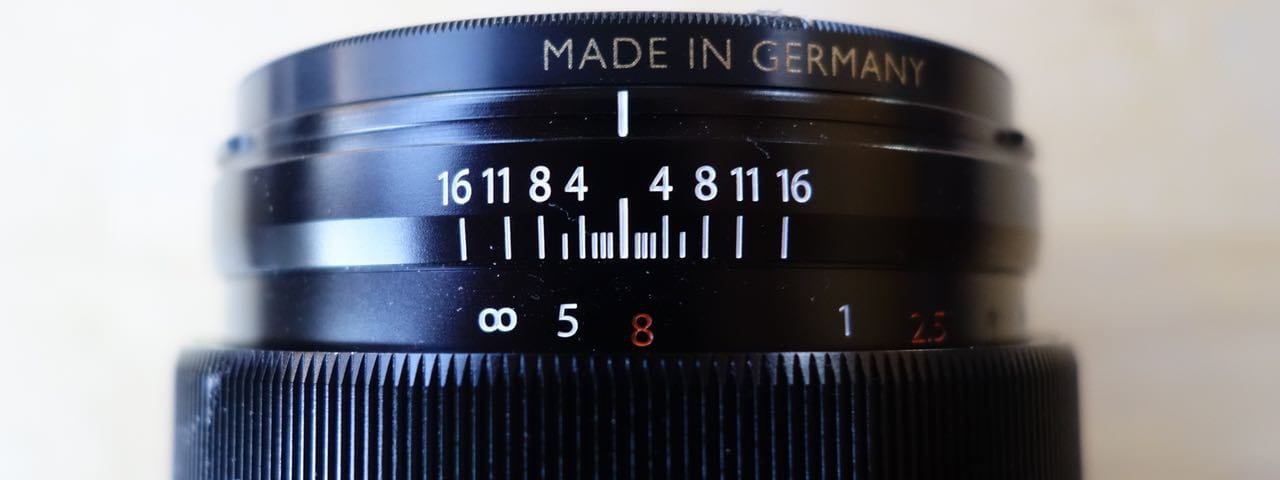
Your camera’s auto focus is relatively useless at night. I almost always shoot in manual mode. I will focus on the subject by hand and since I also use a relatively small aperture (f/8) it helps keep most of the scene sharp. Another good way is to use distance focusing, unfortunately most camera makers stopped putting distance markers on lenses. Thankfully Fuji is bringing them back. Distance focus tells you at this aperture what distance range is in focus.
Equipment – Tripod
The Tripod is probably one of the most important pieces of night photography equipment. You want something solid and sturdy, but light and flexible so that you’ll want to carry it wherever you want to go.
My view is there is no such thing as perfect, so I have three tripods for different situations. I have a medium, light and tiny tripod. My medium tripod is a Bogen/Manfrotto legs and head: legs are model 3001BN and the ball head is 3055. I’m perfectly content with the head and would recommend it. The tripod legs I would recommend an alternate model, the Bogen 3021B, that model comes with quick release knobs for extending the legs. My tripod legs are screw knobs and it takes a little more time to extend.
My light tripod is the Velbon Ultra Maxi. This one is nice, light and packable, great for travel. The maximum height isn’t the best and it can’t hold a big Hasselblad or any really big lens, but works great for smaller mirror-less and works ok with DSLR but would worried about windy locations and stick with a smaller lens. It is a great travel tripod and I almost always have it around.
My tiny tripod is one of the table top models, a Bogen 3007 I hardly ever use it for night photography but I always have it in my bag. These little tripods are strong, I’ve used them with my Hasselblad without problems.
That is just my equipment that works for me, I haven’t reviewed tons of versions so can’t claim its best. Try to test them out in stores and find what style work for you. People seem to be very particular with their tripod selection; quick release system and other options. Here are a few other articles discussing it:
I recommend investing in a good solid tripod, it makes a big difference for clear shots and if you get a good one it will last longer than most of your camera equipment. Plus the magic of one standard screw mount, it works with all cameras and equipment.
Digital Settings
White Balance
White Balance can be tricky at night because different types of lights give off different colors, often times you can get many different lights in the same scene. It is usually a good idea to set your white balance to a specific color and take all your shots with the one setting. If in post processing you find that it should be something else, you can adjust the whole batch. If left on auto white balance, shot to shot might look wildly different and it might be hard to figure out why.
It is common to shoot at night to use Tungsten white balance, or tungsten film, especially when relying on moonlight. This gives more of an blues and purple color to the film which is what we associate with night.
Noise Reduction
Many digital cameras have a noise reduction setting for long exposures. What this does after the shot is complete, tries to calculate the pattern of the noise and then removes it from the image. My experience has been that noise reduction takes almost as long as the original exposure and I don’t really notice a difference. So I almost always turn this off.
Accessories
Flash Lights
Depending how dark it is where you are shooting, you will probably need a flashlight just to see camera and setup. I have several in my bag, one of the new little LED key chains are bright, last a long time and work pretty well. You may also want to use lights to brighten elements in the scene; different colored lights can add some fun effects.
Timer
You might need an external timer or watch. My new camera will show the count up of the exposure time on the LCD as it shoots, which is really nice. When shooting film, I used a kitchen timer but now simply use my cell phone.
Even if your camera or remote times the exposure, it’s still nice to use an external timer, in case you walk away or get caught up talking.
For Android, I use the Timely app and I use the Screen Filter app which keeps the screen dimmer so I don’t lose night blindness.
Additional Tips
Look out for cars that might drive into your scene, its nice to get some car trails. However, if they are close and pointing directly into the camera, the headlights can destroy a shot really quick. Also, good idea to use your lens hood to avoid light spilling into your lens.
If you want to take a photo of the moon itself, it’s a bit tricky to get it not washed out. Also, unless you have a long enough lens it will be pretty small in the frame. The moon is a sunlight object and you can apply the same “Sunny 16” rule, which is an aperture of f/16 amd exposure 1/ISO. So if shooting at ISO 200, the exposure is f/16 and 1/200 of a second.
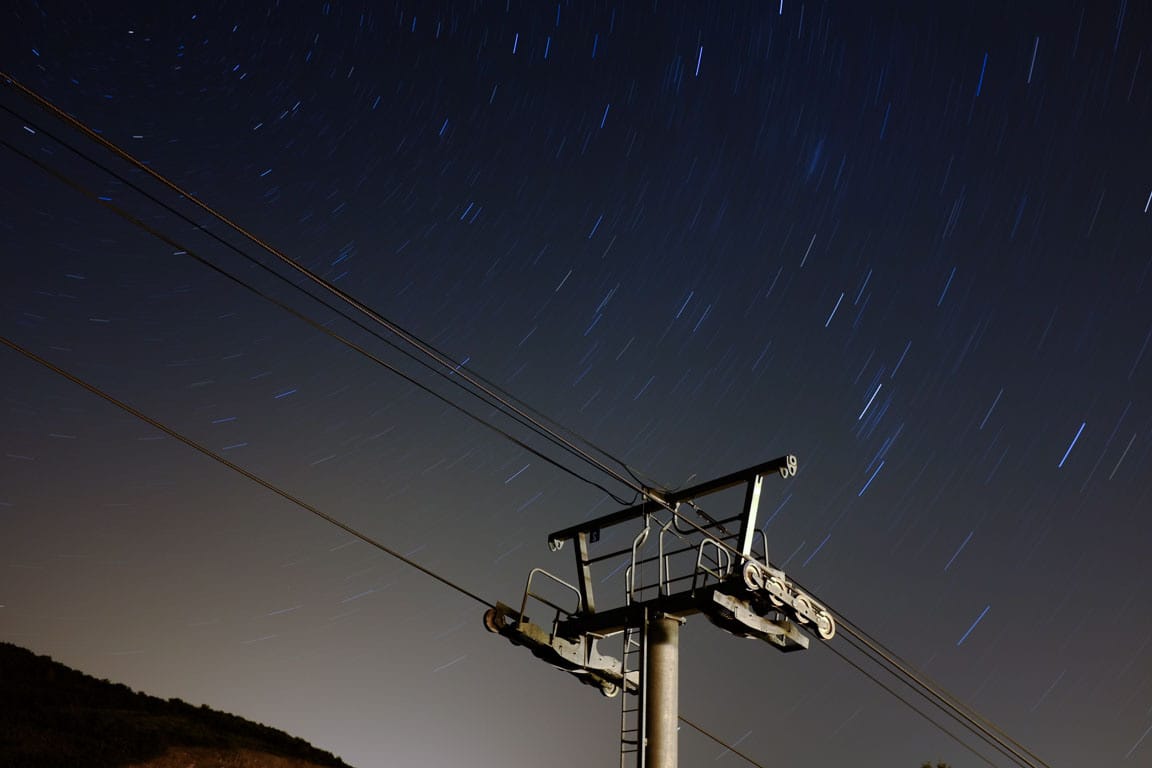
If you want star trails, which add a lot of excitement to an image you’ll want even longer exposures. You may need 30 minutes, an hour or more, you can get longer exposures with using a smaller aperture, or if you want a really long exposure, combine with neutral density filter.
Summary
I hope this guide helps get you started in night photography, or gave you some new tips when you go out. I welcome any feedback or suggestions, shoot me an e-mail from the about page.