Tips for Night Photography
Overview
Night photography is one of my favorite branches of the photography tree. It is not your standard shots: long exposures at night allow for surprises and interesting effects; lighting is provided by the moon or artificial; plus numerous other unknown factors (such as airplanes) all play into night photography.
Here’s a few tips and things I’ve picked up while shooting night photography. Hopefully it is helpful to you and encourages you to get out there and shoot. Sometimes the dark of night is the only free time we can find for ourselves and photography.
Most Important
In my mind, the two most important things for night photography is:
- Warm clothes and
- Food and Drink.
If you are hungry or cold you aren’t going to be motivated to stand out there and shoot 20 minute exposures.
Ok, so we aren’t hungry or cold, so next, you should probably have a camera and film/memory/batteries. Digital or film doesn’t matter much, what is really important is Bulb, or long exposure settings on your camera. Many small point-and-shoot digital cameras are limited to this respect. My Canon S410’s longest exposure is only 15 seconds, barely adequate for anything but bright lights.
Another great thing, but not necessary, for night photography is a friend photographer. Some one to give you a little extra encouragement to get out, to stand with you and chat with during the long exposures, another vision and set of ideas. Plus having some one else there gives you a sense of security in the dead of night, especially if you are in shady neighborhoods where all the great shots hide.
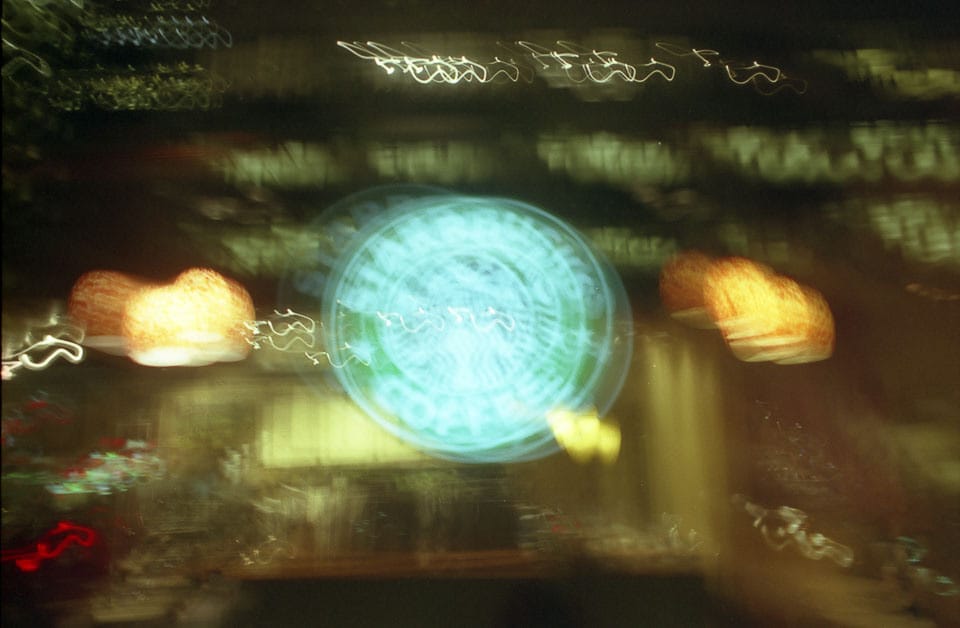
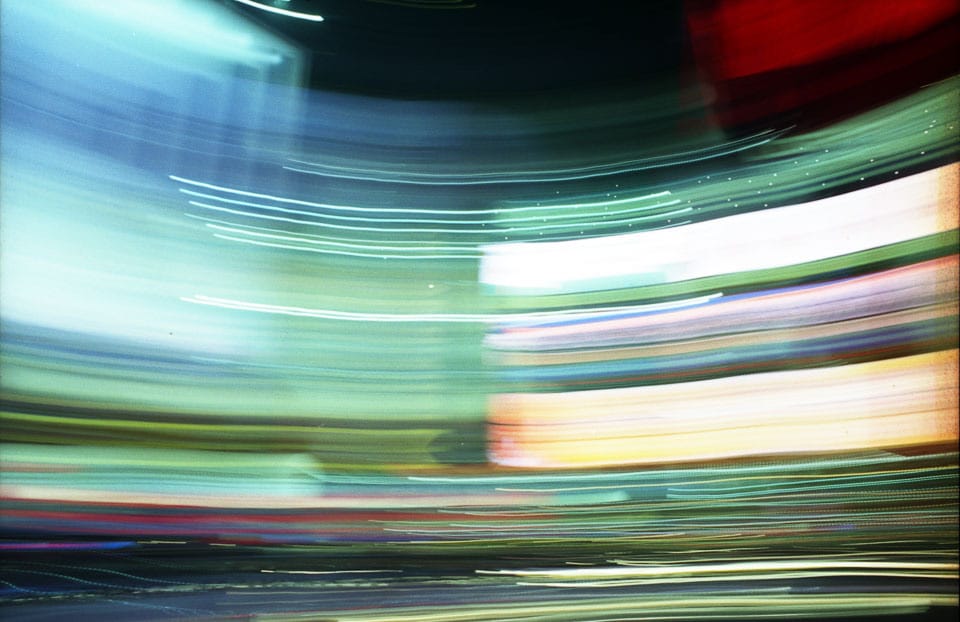
Technique – Handheld Night Photography
A tripod is also pretty important, but as these handheld shots show, you don’t always need one. The following three shots were at Times Square, handheld, four second exposures:

Technique – Exposure Time
One of the hardest parts of night photography is getting the exposure close, let alone getting the right exposure. Numerous factors come into play from light source: moon, artificial, reflections; to film type and reciprocity. A big advantage for digital cameras is being able to see what you captured immediately, which at least gives you an idea if you’re in the right ballpark.
I have an exposure calculator and write up on Exposures for Moonlight Photography. However this only covers the instances when you are taking pictures only by the light of the moon, this does not cover any city shots, or weird combos of artificial light and moonlight.
The single greatest method to get the right exposure is: practice, practice, practice; and take good notes. Usually all I record is the subject and exposure time. I normally shoot night stuff at f/8, if I differ I’ll make note of it too.
For city shots with a fair amount of light, you can still meter and be reasonably close. If you take into account reciprocity, film sensitivity falls off with more time, you should be alright. Reciprocity is tricky, black and white films have a much steeper fall off, while slide film is more consistent. You can see these reciprocity tables for a better idea on it. Digital has no reciprocity issues, so digital exposures at night are usually much shorter than film.
Photography Equipment – Tripod
Tripod — probably one of the most important pieces of night photography is the tripod. You want something solid and sturdy, but light and flexible so that you’ll want to carry it wherever you want to go.
I have three tripods: medium, light and tiny.
My medium tripod is a Bogen/Manfrotto legs and head: legs are model 3001BN and the ball head is 3055. I’m perfectly content with the head and would recommend it. The tripod legs I would recommend an alternate model, the Bogen 3021B, that model comes with quick release knobs for extending the legs. My tripod legs are screw knobs and it takes a little more time to extend.
My light tripod is the Velbon Ultra Maxi. This one is nice, light, packable but is also light weight. The maximum height isn’t that great and it can only hold my 35mm gear with a small lens. A great travel tripod and one to always have around, but not a work horse.
My tiny tripod is one of the table top models, a Bogen 3007 I hardly ever use it for night photography but I always have it in my bag. These little tripods are strong, I’ve used them with my Hasselblad without problems.
That is just my equipment, people seem to be very particular with their tripod selection; quick release system and other options. Here are a few other articles discussing it:
Photography Equipment – Film
Film — Your choice of film has a lot to do with what results you will get in night photography pictures. Tungsten balanced film is very common to use in night photography, such as Fuji’s 64T, which is the primary film I use.
Tungsten balanced films will tend to give you more blue or purplish colors which people tend to associate with night photography. Fuji’s Provia is also another popular film for night work. I’ve used Kodak Porta 400VC, the results were more of an orange tint, not quite as pleasant. Again: practice, experiment and take good notes.
For black and white film, I’ve used Kodak Tri-X and Ilford HP5 and FP4 films. The Ilford films have slightly better reciprocity, but I wouldn’t declare any of the films to be clearly superior. For reciprocity alone, Kodak’s T-Max seems to be best, but I’ve always avoided T-Max, I think my early B&W instructor scared me away from it.
I plan to experiment more with black and white films and development techniques for night photography. I’ll post my results when complete.
Non-Photography Equipment
Flash Lights – You will probably need some form of light just to see depending how dark it is and where you are shooting; loading film in the dark always sounds easier than it is. The new little LED key chains are bright, last a long time and work pretty well. You may also want to use lights to brighten elements in the scene; different colored lights can add some fun effects.
I personally have a few LED key chains, blue and white; I have a big Mag-light flashlight and a few mini-Mags. If I’m lucky I remember to bring one of my flashlights.
Timer – The simple matter of timing your exposures: you can use anything from counting in your head, a watch or a friend of mine uses his Palm Pilot. I normally use kitchen timers or if short enough count in my head.