Photography Fundamentals
Getting into photography can be intimidating with all the jargon and technical terms. Your camera itself is pretty intimidating with the dials, menus and buttons galore. This guide is to explain some of the fundamentals and help improve your photography.
Photography: Light and Time
Photography is all about recording light, which is exactly the definition of the word. In photography, there are three aspects that going into the recording of light:
- Quantity: How much light are your recording
- Time: How long do you record the light
- Sensitivity: How sensitive is the material recording the light on
The combined setting of these aspects is called the exposure. There are controls within your camera to control the overall exposure. They are Aperture (quantity), Shutter Speed (time) and ISO (sensitivity). In auto-exposure mode, the camera tries to average them all out to get a balanced exposure. However, you can adjust each of the controls to get different results in your image.
Aperture
The aperture is the mechanism inside a lens that controls how much light gets through. It is measured by numbers called stops, for example f/8, f/11, f/16. It is a ratio of the focal length; so the smaller the number, the wider the opening. The difference between the numbers is a doubling of light, so f/8 will let through twice as much light as f/11.
The size of the aperture effects the depth of field which is how much of the picture is in focus or blurred. If you want a blurred out background, open up the aperture to as wide as possible, like f/2.8, f/2 or lower.

If you want super sharp images which has everything in focus through out, set your aperture to f/11, f/16 or higher
For me, the aperture is the most important control so I normally shoot in aperture priority mode which lets me control the aperture; the camera’s auto-exposure will adjust shutter speed and ISO to properly expose the scene. Aperture priority controlled by setting your camera’s mode to A.
To control the aperture, set the mode to A (or Av on some cameras) and then change the different aperture settings using a dial on the lens itself, or one of the wheels on your camera.
Shutter Speed
The shutter speed is how long the camera records light. While the shutter is open, the lens gathers light onto the sensor and the camera is recording the world until the shutter closes. Often this is only for a thousandth of a second but can be as long as minutes or even years.
The image and subject will look different depending on the shutter speed. Here are a few time guidelines:
| 1/1000 and faster | Freeze extreme fast action (race cars) |
|---|---|
| 1/250 and faster | Freeze kids, everyday sports and action |
| 1/60 | Typical low bar for hand-held and avoiding blur |
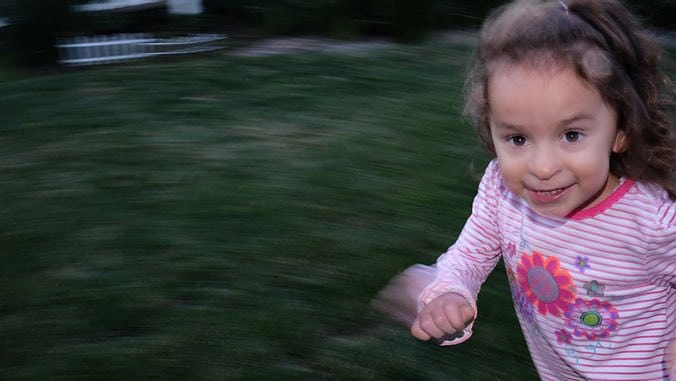
| 1/8 | Add motion blur, panning subject |
| ~2 seconds | Add smooth blur to water (tripod) |
| 30+ seconds | Low-light and night photography |
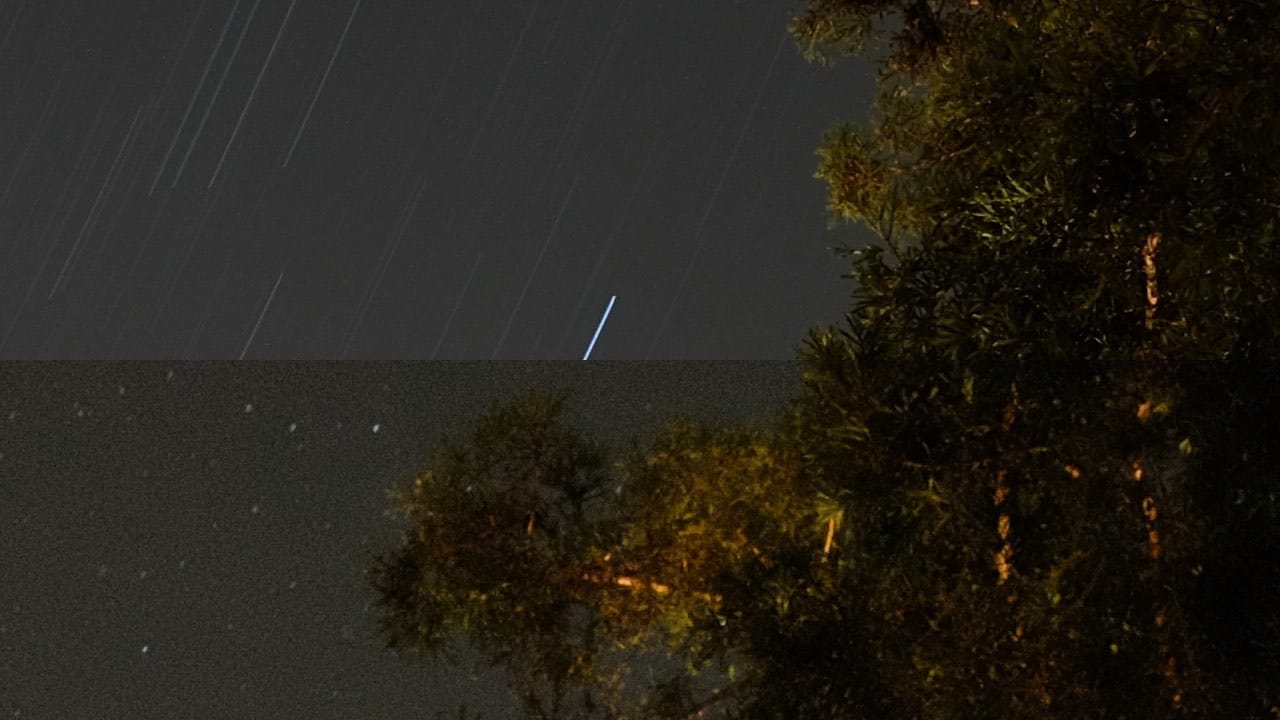
| 15+ minutes | Star trails and astro photography |
The main points I look for in shutter speed is if I’m shooting my kids and don’t want blur, I try for an exposure of at least 1/250. Otherwise I just try to keep it above 1/60 to avoid hand-held blur. For night photography the exposure time is a whole other thing; you end up with some really long exposures.
You can also shoot in shutter priority mode, usually specified by S or Tv. In shutter priority, you set what shutter speed you want to take the photo, and the camera’s auto-exposure will adjust the aperture and ISO automatically.
I personally don’t shoot in shutter priority mode too often, it tends to be more common for action and sports photographers.
ISO
The ISO is a standard for film speed; its a measure of the film material sensitivity to light. Back in the film days, you would buy a roll a film at a set ISO based on what you were going to take pictures of. Now in digital, you can adjust ISO from shot-to-shot giving more flexibility.
I don’t really understand how digital ISO works, but the technology doesn’t matter, all we need to know is it mirrors film behavior and the lower ISO will give clearer images and higher ISO will give grainy or noisy images. Film grain looks a bit better than digital noise, but a small tradeoff for the conveniences of digital.
Older materials in the beginning of photography were not nearly as sensitive and would require several minute exposures. Making portraits required the subject to sit still for that time, probably why no one smiled in older photos.

ISO is the most flexible of the settings, I almost always leave this in auto mode and let the camera adjust as necessary. If I’m in a scene which is just too dark and requires a high ISO, I’ll take the grainy image. I’d rather have grain then motion blur from using too low of a shutter speed.
My night photography is a little different, since I’m using a tripod and will have longer exposures, I don’t want the grainy images. So I’ll manually fix the ISO to the lowest setting, typically an ISO 100 or 200.
Exposure Trade Offs
As you might see above, adjusting one of the settings also requires changing another. So if I want to get a long exposure to record star trails, I’m likely going to need a very small aperture and low ISO.
If you want a shallow depth of field on a sunny day, this requires a wide open aperture which is a lot of light, so will require a very fast shutter speed and low ISO.
If you are indoors and want to shoot a scene with a lot in focus, this requires a smaller aperture, slower shutter speed, and higher ISO.
The next section will cover how your camera calculates these and sets the auto-exposure.
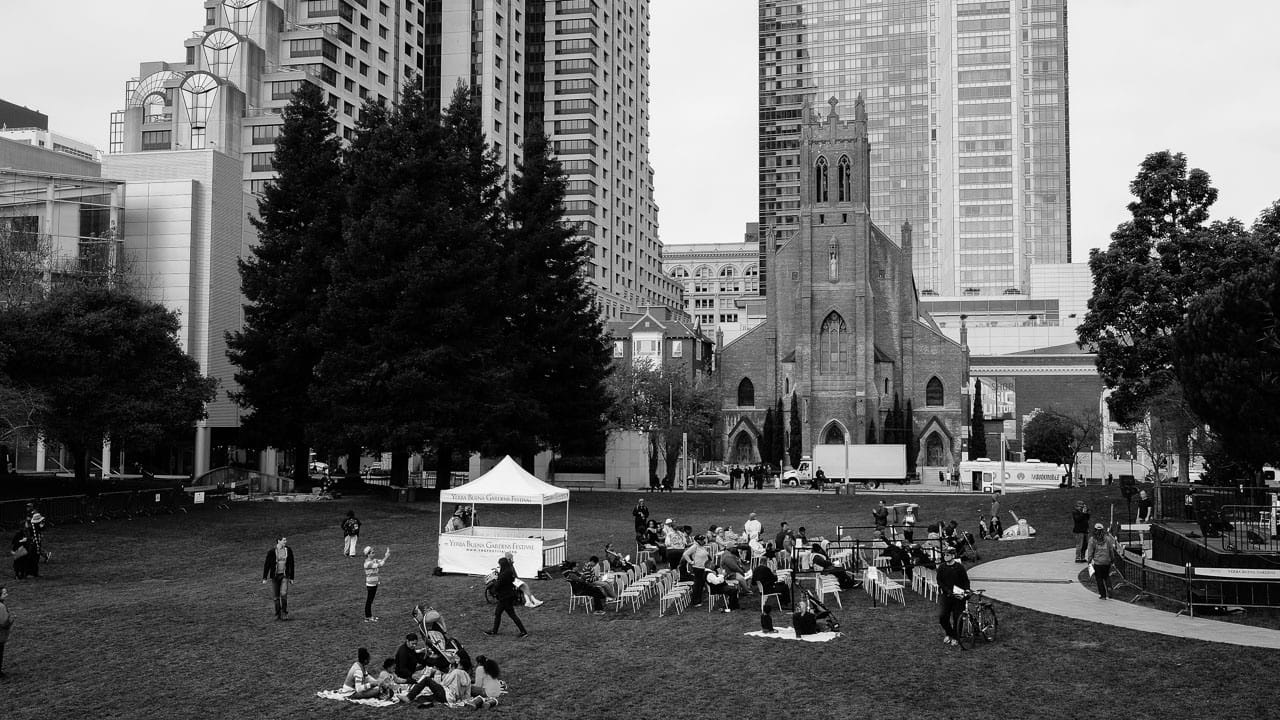
Metering
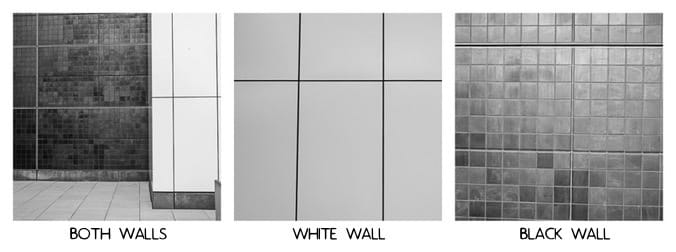
The camera has a light meter built-in which measures the intensity of the light. It averages all of the light in the scene and creates an exposure. The camera makes a big assumption that the average will match a middle gray. The camera doesn’t really know what you are taking photos of so assumes on average the average is best.
You can see this by setting your camera to auto-exposure and take a picutre of a solid white wall, a solid black wall and a solid gray wall. Without any adjustments, the camera will produce the same result: a solid gray wall.
I didn’t find a grey wall, but here’s an example illustrating it. The square on the far left is both white and black parts of the wall. The center is a photo of just the white wall, and the right square is a photo of just the black part of the wall.
Understanding this will help with setting your exposure. There are a couple of different ways to adjust for this. The most common and easiest way for me is to use the exposure compensation dial, which is the +/- dial.
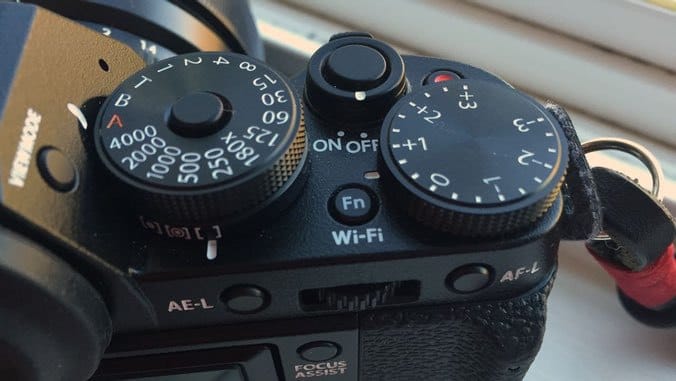
This allows you to add more exposure, by changing to +1, +2, +3 – the number is how many more stops of light you want added. So +2 would be adding two stops of light which is 4x as much light. Conversely for minus, -1 would be removing a stop of light.
The most common time I use this is for a backlit picture, for example a person standing in front of a window or a very bright sky or background. In this scenario, the camera sees all the bright light, like the white wall and reduces the exposure to try to average down the scene. This leaves the person’s face dark, so you need to adjust the exposure compensation and add light.
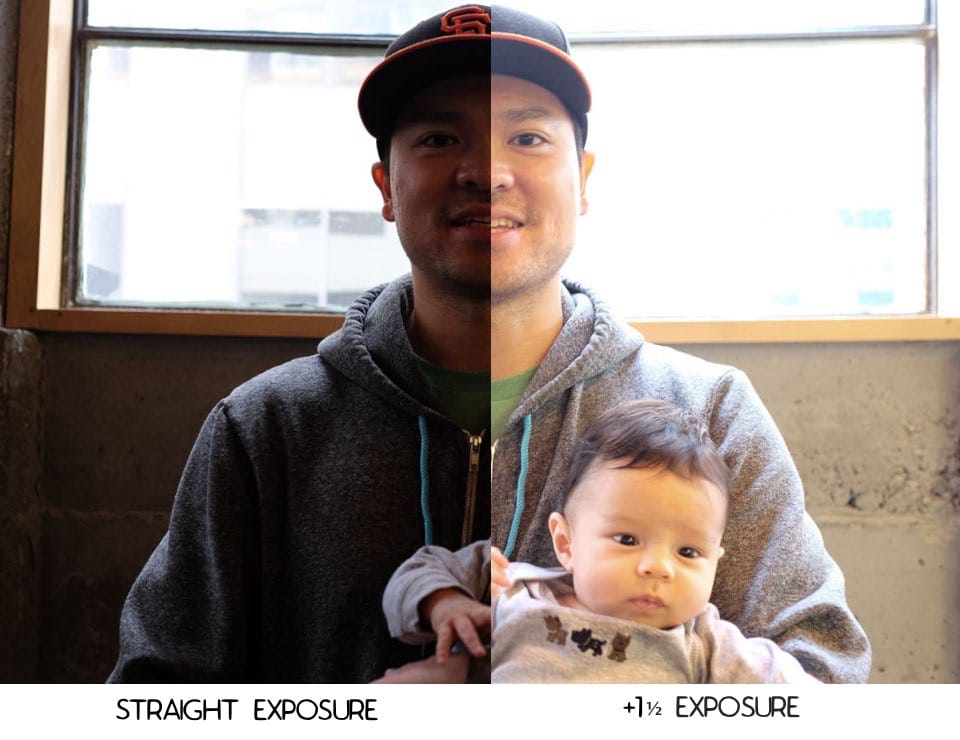
In the photo above, the straight from camera exposure left the main subject too dark, so I dialed up the exposure compensation, in this case adding 1.5 stops of light, which might of been a touch too much.
Metering Modes
Another way to adjust how the camera determines the exposure is to fake out its meter. Since the camera wants to make the scene a middle grey, you point the camera at a grey or neutral subject like grass and get the proper exposure; then manually set the exposure so it doesn’t change when taking the real photo.
Cameras have different ways to set the metering mode, different modes include spot metering, matrix metering and a few others. These tell the camera how much of the scene to use for measuring the exposure. Spot metering uses a smaller area, matrix uses a wider area, etc.
The metering modes are a bit trickier and requires a little extra work in my mind. I have a couple grey cards but never carry them around. I find it easier to take a picture, review and then dial-up or down the exposure using +/- as needed, another advantage of digital.
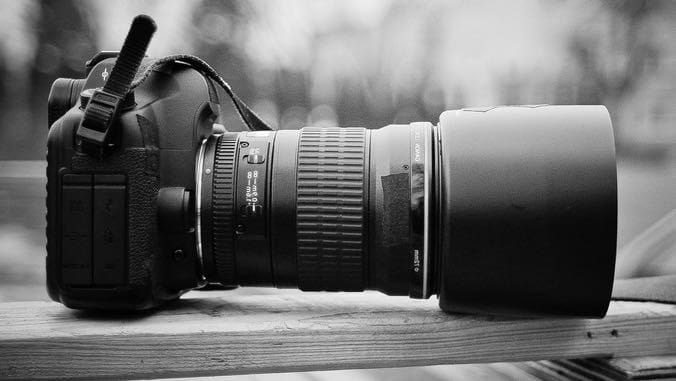
Lens
Most modern day lenses are really good and will capture sharp images without a problem. You can spend a great deal more on a lens and the difference will be hardly noticeable by the majority of people. Especially when photos are only shared online and not enlarged to really large prints.
My general advice for beginners is to use what you have until you notice a limitation. You can improve a lot of your photography by better technique and learning how to properly expose before the lens is any limitation. Likewise, you can use an expensive lens poorly yielding poor results.
Lens are described by two numbers, the focal length and the maximum aperture. The focal length is the “zoom factor” or what field of view does the lens capture. A wide angle lens is a low number like 24mm, a telephoto lens is large number like 100mm. A normal lens is typically between 35mm and 50mm, close to how our eye sees a scene.

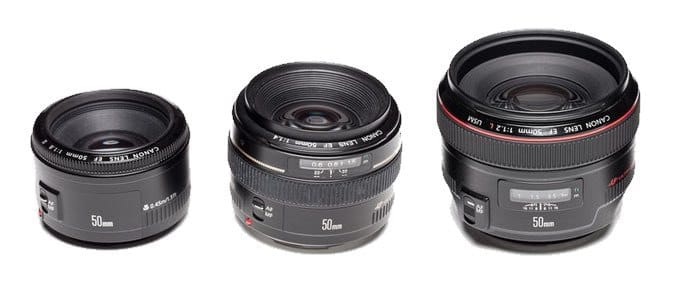
The second number is the maximum aperture, the same aperture number mentioned above. Good lenses are often called fast lenses, they have a large maximum aperture such as f/1.4 which allows more light in and also able to blur out the background more. However, a large aperture also means a physically larger lens, which may be less fun to carry around.
Here is an example of three Canon 50mm lenses, their f/1.8, f/1.4 and f/1.2. You can see the f/1.2 is significantly bigger even though they all have the same focal length (zoom). Plus, you’ll pay for all that extra glass, the f/1.8 is $125 and the f/1.2 around $1,500.
Lenses that can zoom in and out are described by the lowest focal length to the highest focal length, for example 18-55mm; which would be wide-angle at 18mm and zoom to 55mm. Also, these lenses tend to have a variable maximum aperture depending on what zoom, this is described by f/3.5-5.6. So at the widest angle the maximum aperture is f/3.5, but at the zoom level of 55mm the maximum aperture is f/5.6.
Together the lens would be described as a 18-55m f/3.5-5.6
Summary
This guide contains a lot of information and likely overwhelming if its new to you; learning the above covers the majority of photography and equipment involved. Most advanced photography techniques and tips are based off adjusting the above, so worthwhile to take your time and understand. When it comes down to it, photography is just managing how you record the light.
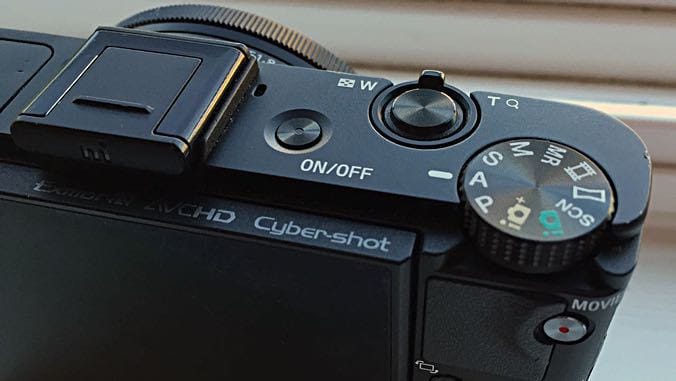
Each camera and model does things a little different, but the terms and concepts remain the same. To learn how to do something specifically with your camera either read your manual or google the term with your camera model, for example “Nikon D700 exposure compensation”.
I hope this helps, my best advice is really get out there and shoot, practice and learn; as the famous photographer Henri Cartier-Bresson said, Your first 10,000 photographs are your worst. The best way to learn is to start getting rid of those worst shots.